|
|
|
GALLERY CONTINUED
PAGE ELEVEN
So, you've just made a 500 frame render that took 24 hours (leaving anti-alias off), and find that four frames slipped through that will embarrass you right out of getting an interview, or being able to "sell" the erstwhile animated short to pay next year's yacht slip rental at the Marina. What to do? The next 500 frames are in queue, and the third scene with lip synch has yet to be animated.
Now, you should have created an image sequence by rendering single images, knowing how easy it is to type the few letters of the name (short names are essential with image sequences, and should not end with numbers, though they can begin with numbers), and let the Images panel loader take care of the rest, creating an "avi" from an image sequence in a matter of minutes. But if you did create an "avi," all is not lost. Since you are going to use \"Vidget" from http://www.newtek.com/ or a free program like "Bink" from http://www.smacker.com/ to disassemble an avi into TIFF's, the solution is to grab the frames, fix them, and re-assemble the avi. Do not use "JPEG" compressed format to save images, as I learned from a foggy shot that went grainy. Apparently, BMP's, TIFF's and TGA's are all preferable. TIFF's are recommended highest and are familiar to non-CAD users, though TGA's have been around for years and are a common file format for LIGHTWAVE texture images.

There are actually TWO ways of doing this I havelearned over the weeks of playing with INSPIRE. The FAST way is probably going to be to COMPOSITE the offending frames as a background using the "Load Sequence" button in the Images Panel, and eliminate all of the objects but the foreground character and the pad, in a different position. Save those frames, and replace the offensive ones with them.
TA-DAH!
The alternatve fix -- before I realized how wonderful the "Load Sequence" button is -- is to make an arm going through a sketch pad appear NOT to go through the sketch pad by object-dissolving the sketch pad out for those frames, and then erasing through the resulting image pasted over the original in a paint program like Adobe Photo Deluxe, and saving this file over the original TIFF. Sometimes one can "clone" out a shadow or other element, but three frames needed the extra attention.
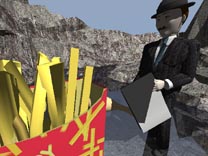
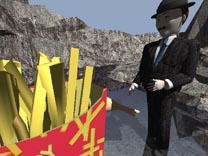
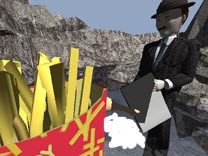
A few little discoveries: in the second image, the sketch pad's shadow remained though the pad was gone, which was fortunate; but then I compared again, and discovered that since the pad had been metamorphosed to open, I had two shadows in all the other shots, so that I found myself correcting all of these shots twice, having fortunately backed up the originals in another file. Compare the first and fourth shots shadows and you will see what I mean. (The third shot is a "dummy" of what the erased layer should look like) This also taught me that when ray-tracing metamorphoses, it's a good idea to object-dissolve out the target/original object. Compare the first and last pictures and the fix will be clearer.
Except for the little surprise, time to correct: less than an hour.
TA-DAH TWO!
OTHER LITTLE PHOTO DELUXE FIXES
LARGE RAY TRACING BLACK MARKS: the fastest solution is probably to re-render. These are caused either by overlapping faces that need to be pulled apart or edited, or by the need to triple, or occasionally by the need to "Align" and "Unify." Tripling and re-rendering often works for me. There is also the possibility that the "merge" command may have an effect. "Shadow-mapping" is another option, especially with spheres that simply will not render correctly with ray-tracing. (I should add that there are better authorities on these problems.) The "clone" tool can sometimes be used to fill in black areas. One can also use "seam patches" described on page 10, though these require managing a half dozen variables.
SMALL BLACK RAY TRACING DOTS OR LINES: if the problem is a few frames, these areas can be "selected" using the Adobe "Smart Select," "Polygon" or "Wand," and then in the "Advanced" "Repair" menu, select "Remove Dust." This function has a slider control that removes these little artifacts like magic. YES!! Again, the real solution is to fix the real problem; ray-tracing NEEDS three-edged polygons. Open all the offending object files in Modeller, use the "triple" command in "Tools" and re-save them. Can one filter the whole frame for the whole sequence and skip "selecting?" Yes, a setting of 2 pixels and 150 layers, using Adobe Photo Deluxe's "Remove Dust," seems very effective, though more could seem to add "fogginess."
PREVIEWING FIXES: May I also suggest using software to preview the fixes as soon as possible? Using the Images panel "Image Sequence" requester, you need only to set the "frame offset" and then render an "avi" with a beginning and end frame range covering the fixes.
UNWANTED INTERPENETRATION (Hand through bottle, etc.): See above.
WRONG TEXTURE MAP/COLOR OBJECT: The same technique above applies to anything that is amiss in a shot, if it only occurs in a few frames. Re-render just those frames, and correct by compositing or erasing. Computer animation is a blast for forgiving these mistakes. Experts in "compositing" will tell you that if you separate the objects from one another, and render them separately, saving both "tga" and alpha matte (tga, iff, whatever) there are a number of fixes one can do by "front projecting" multiple textures.
ADDING FADES/DISSOLVES/DRAMATURGY: "Dramaturgy" is the encyclopedia of ideas for fixing slow or otherwise uncomfortable parts. Usually, the central issue is the Golden Rule, what is being communicated, if anything. Adding a character's internal voice-over is a common "fix" for comedic cartoons. If the beginning is very slow, some of this may be covered by adding a fade. Fades are a good way to end, but strong jokes will tend to end on a cut to black. Cutting on "punch lines," whether to close-ups or other characters, is also sometimes effective. Music compresses slow sequences dramatically sometimes. Common segues to music are environmental effects like lightning, tree leaves rustling, or cars. Creating fades is pretty straightforward. If rerendering is possible for just the frames of the dissolve, by all means object-dissolve a black slab in front of the camera -- and you're done. Another way to do fades or dissolves using INSPIRE itself, is by texture mapping the image sequence using the "Load Sequence" button in the Images Panel, to a slab and either object-dissolving a black slab in front of it, or "enveloping" a light darkening or adding an "alpha channel" animation. Dissolves take more preparation to be done efficiently -- for instance, by creating two single polygon slab objects with sequences for their texture maps, and using "object dissolve" to go from one to the other. One can also combine a fade-in and fade-out in this way by loading one on top of the other.
You may also want to ask around -- home movie programs are appearing every day that can add fades, dissolves and other effects to fairly dense "avi" files. Make a few phone calls and save some work.
CLOSE-UP'S, WIDE SHOTS: Doing Close-Up's, Zooms, Wide Angle paste-up's and other "optical" techniques is pretty straghtforward using the "Load Sequence" texture-mapped slab technique in INSPIRE. Save the successive images and recombine them later in "Bink" or "Vidget."
< BACK . . . . . . . . . . . . < HOME > . . . . . . . . . . . . . . NEXT >

