|
|
|
GALLERY CONTINUED
PAGE TEN
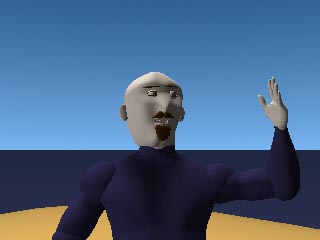
Before (Shoulder)
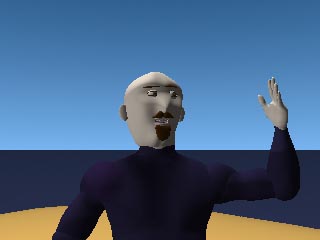
After
It's not what you might think.
One of the coolest graphics things I recently learned is how to use negative transparency image surfaces to create three-dimensional mattes. It is a fun technique for tree leaves, thought balloons, seam-smoothing patches, (fur?), peacock feathers, crowd scene techniques, emulated video effects, adding subtitles, and some very fanciful elements. The "technique" is just to make a white on black drawing and enter that as the first texture, then "add" the detail texture over it, in this case, the GIF color of the leotard -- press "Use texture." Then, give the surface a 100% transparency, click on the "T" button for transparency, and load the same drawing, but check the Negative box.
But why stop there? This is a great technique for getting ethereal as well as realistic effects. X-ray vision, windows, lattices, store window paintings, corn stalks, harp strings, tornado debris, a screwball effect like a huge heart thumping out a love-struck duck's chest, neon, a tangled net or ship rigging, hanging laundry, a metamorphically animated doggy tail, the dizzy rabbit's halo of stars, ceiling fans, eyelashes, pond ripples, grass skirts-- and many of these are fairly "un-computer-looking."
Two out of the three seams created above may be removed by careful "welding" of the ball joint areas. This technique may be tried for somewhat covering the moving third seam with a sort of textured "mist." One or both ball joints will have onion-skin misty areas that somewhat conceal the seam. This is a lot of trouble, but with the right texture, might be worth it.
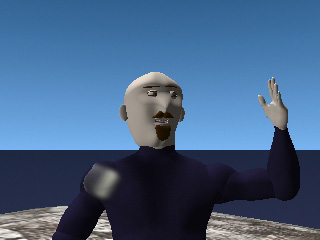
Positioning the texture map on the patch is a big part of the work, but if you start without adding a texture or turning on "Transparency" in layout (the third image, below), that helps one figure how to rotate the matte in a paint box and get a good size and center. It should run parallel to the seam and be feathered along the edges, but I have had success with the wrong direction and less feathering. Try a blurred oval patch, experiment!
One other thing to mention about this technique: if you are like me, and had a fairly eclectic learning curve, DO learn the habit of loading and saving surfaces properly NOW, so that once you have positioned the patch, you can save the surface settings and forget about it. I have also used this method to fix seams in other objects, but "weld" does more than most realize.
My hat's off to Stephen Stahlberg, who first described a version of this technique on his website. One of its great boons is that when the object moves or metamorphoses, the feathered texture above it also moves, continuing to eliminate the seam. The "seam" of object interpenetration is at least caused because most CAD software disables smoothing where an edge occurs that is not bounded by related points.
Are there other ways around the ball-joint seam issue -- how to have anatomical motions/objects that use metamorphosis, bones and hinging without creating seams? The answer is currently "no." One may not animate with hinging and then load the settings automatically into bones, though a similar method does allow animating with bones and seeing hinged "layers" approximate the effect in LIGHTWAVE 7.
< BACK.. . .. . . . . . . . . . . < HOME > . . . . . . . . .. . . . .NEXT >